That being said, if you would have any questions, problems, or need assistance
with any of these steps, please contact us on our website at www.lifebio.com or via email at info@lifebio.com, or call us at 1-866-543-3246.
You can sign up for free a 14-day Trial
account, or login here once you already have an account set up.

If you are signing up for an account, enter
the information requested in the provided blanks (such as your email address, creating a
password, your title, your first name, etc.). Use your mouse to left click on a blank and
enter information, or hit the Tab button to move from one blank to the next blank.
Once you have completed all the blanks, click enter or “Create”.
If
you need help setting up an account, call us at 1-866-543-3246 or email info@lifebio.com.

Once you have an account set up, log in by
entering your Email Address or username ID and Password. Be sure to click enter or “Log
in”.

Then it’s time to start writing a biography
or an autobiography. First find the Stories column, and click on “CREATE A NEW
STORY”.

4) CHOOSE TYPE OF STORY
Then choose which type of story you want to tell, by selecting one of our Stories options (such as Capture Your Story, Life Story Journal, or Veterans Story). You can read each story's description underneath its name. If you click "Write a Story" you can start a story in order to see all the questions contained in that particular story template. We often suggest starting with the About Me Journal (second one down in the right hand column), if you are unsure where to begin.

To start a new story, you will be asked to
type a Title and Author(s). Then click enter or “>Next”.

6) TYPE STORY
That will take you to the template where you can start
typing a life story. To move from question to question, left mouse click on the
numbers above. In the text box provided below, type your answer.

You can type as short or as long of an
answer as you like. Here is a sample.

Here is another longer sample.

If you don’t want to answer any questions,
just leave them blank, and move on to the next question.
The website automatically saves your work
every 15 seconds. You can also click on one of the three SAVE buttons from time
to time, or before advancing from one question to another. All three buttons do
the same thing, so it does not matter which you click.


As you type, you can use the onscreen menu buttons
to change font styles, such as bold, italics, or underlined.
You can also do things like insert bullet-point lists or spell check for
errors. You do not have to use any of these options, if you do not wish to.


7) UPLOAD MEDIA (optional)
You can (but you absolutely do NOT have to,
if you do not wish to or are unable to) upload audio files, video files,
pictures, and other files to your personal online media gallery. First click on the green “MEDIA GALLERY” button in the upper right corner. Then that will bring you to a screen
similar to this.
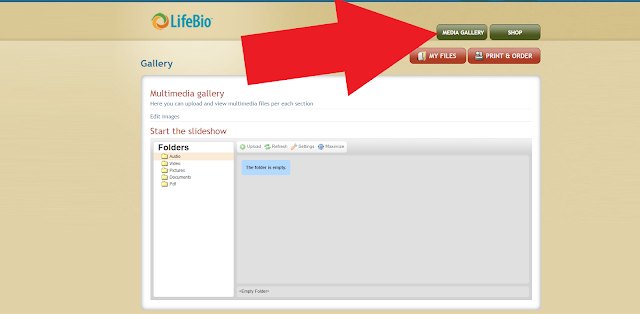
Then choose the type of file you want to upload from under the folders list on the left (Audio, Video, Pictures, or Documents).


Then choose the type of file you want to upload from under the folders list on the left (Audio, Video, Pictures, or Documents).

Once you are in the folder type you want,
click on upload. This will pop up a box for you to search for the file you want
to upload from your computer. Once you have found the file, double click to open
and upload it to your LifeBio Media Gallery Folder.


You will see the progress bar fill up with
blue, as the file uploads. This is a sample of uploading an audio file.

Once the file is complete, you will see an icon for it in your folder on your screen.


Once the file is complete, you will see an icon for it in your folder on your screen.

You can do the same thing to upload videos
or photos. This is a sample for uploading a photo.


You can also upload other documents. Documents
will store any pdf or doc files, such as for family trees or typed documents.
This sample shows uploaded pdf and doc files.


8) INSERT PHOTOS INTO STORY
There are a couple of ways to insert
photos. First you need to have the photos saved in your Media gallery, as
explained above. The easiest way is for you to then upload and insert photos to your story, and
then allow the website to automatically put the photos at the end of the
question where you insert them.
First you will need to be on the question/answer
where you want the picture inserted (in this sample, the photo is being
inserted with question number 5). Then click on the “ADD PHOTO” button in the
upper right corner of the menu bar.


That will pop up an “Add your Photo” box.
You will need to click on the bottom “Upload Photo from my gallery” button.


Then you’ll need to click the top green
button on the right that says “Open Gallery”.


This will pop up a box with all the photos
you have saved to your Media Gallery. Double click on the photo you want to
insert.


This should now show the name of the photo
file you selected. Click the middle green button on the right that says “Add”.

This will pop up a box that says “www.lifebio.com says Your Photo was added successfully. See My Photos below.” Click the blue “OK” button.


This will pop up a box that says “www.lifebio.com says Your Photo was added successfully. See My Photos below.” Click the blue “OK” button.

Repeat that process if you have multiple
photos that you want to insert. Once you have inserted all of the photos for
that question, click the bottom green button on the right that says “CLOSE”.


Once you have inserted photos, you can see
them listed below your typed answer, by clicking on the “MY PHOTOS” button
underneath the text. Here is where you can click to insert a caption for your
photo, if you wish, but you do not have to give each photo a caption. Be sure
to click on SAVE after inserting photos and captions.


The more challenging way to insert photos
is where you do everything as stated above, but you can also choose to insert
your uploaded photos between or with the text of your online story. To do that,
you will need an [[IMAGE]] button where you want the photo to be inserted. To
do that, put the cursor where you want the photo to go within text. Then click
the yellow [P]
button, which will insert the [[IMAGE]] in your text for you.


This will pop up a box that says “Insert
Image Position”. Click the green “OK” button.


This will then insert the [[IMAGE]] button within
your text for you. You do not need extra lines or spaces above, below, or beside
the [[IMAGE]].


9) BORDERS, PRINT PREVIEW, AND PRINTING
In order to see a print preview of your
story, or to actually print your story, click on the red “PRINT & ORDER”
button on the upper right side.


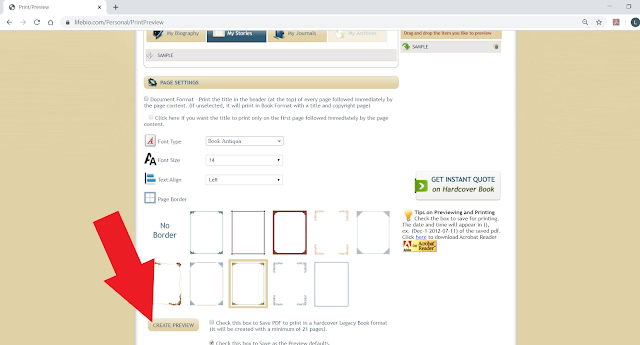
Select which border (or “No Border”) you
would like printed on each page of your book. Each page will have the same border,
as you cannot vary from page to page.


In order to print preview, you will first need
to select the title of your story (this example is named “SAMPLE”), and then
drag and drop that story to the right. As you are dragging it, a green box will
appear underneath it on the right, and then it will turn back to white with
just the book name listed.


Then you will need to click on “CREATE
PREVIEW”.

It will take a few seconds to a minute, but
then it will give you the option to “Open PDF” of your book or “open your Story
as a web page”.


If you are going to print your book
yourself, you could do so from the pdf or web page version.
To get started today, please contact us on our website at www.lifebio.org, via email at info@lifebio.com, or call us at 1-866-543-3246.
What if you aren't "tech savvy"? If typing your own story and inserting pictures isn't for you, we have other options available. If you would like to discuss other methods, such as submitting a handwritten story for LifeBio to type or having a biographer call to interview you and write your story, get in touch today!
Comments